
Table of Contents
Introduction
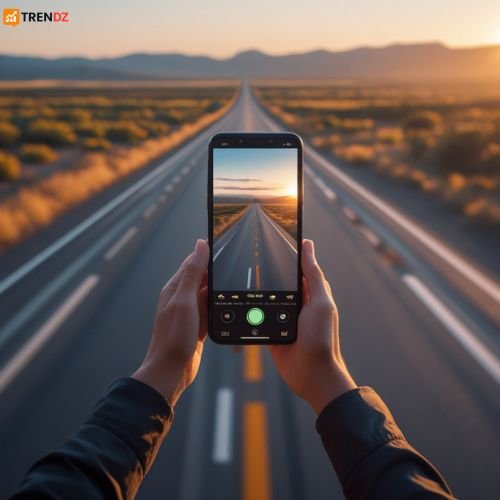
Okay, let’s be real: who hasn’t stared at a gorgeous DSLR photo and wished they could pull that off with just the phone camera in their pocket? 📸 The good news? You absolutely can! Smartphone cameras are insanely powerful these days, and with a few mobile photography tips, you can capture DSLR-like photos without buying expensive gear.
Whether you’re curating your Instagram, documenting your travels, or just snapping daily memories, these 15 mobile photography tips and tricks will instantly take your shots from “meh” to “wow!” 🚀
15 Best Mobile Photography Tips & Tricks
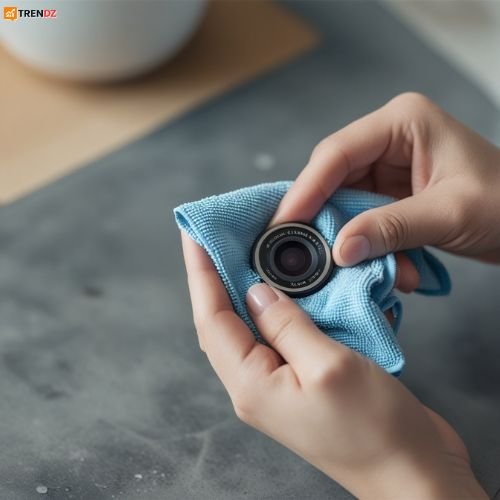
- Clean Your Lens First (No, Seriously!)
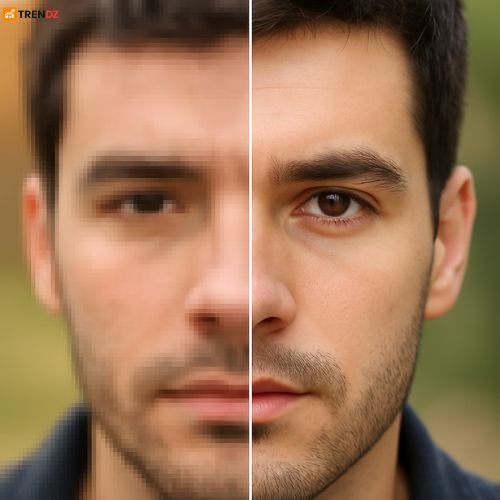
This is the simplest tip but the one everyone forgets. Your phone lives in your pocket, gets tossed in your bag, and your fingers are all over it. All that grime ends up on your lens, creating blurry, hazy photos. Get into the habit of giving it a quick wipe with a soft cloth before you shoot. You’ll be shocked at the difference.
My go-to move: A microfiber glasses cloth. But honestly, a soft cotton shirt works in a pinch!
- Ditch the Flash and Embrace Natural Light
That little flash on your phone? It’s pretty much only good for startling your friends and creating harsh, unflattering shadows. The secret weapon is always natural light. Shoot near a window indoors, or head outside during the “golden hours”—that magical time just after sunrise or before sunset. The light is soft, warm, and makes everyone look amazing. Just try to avoid the harsh, overhead midday sun for portraits unless you’re going for a specific look.
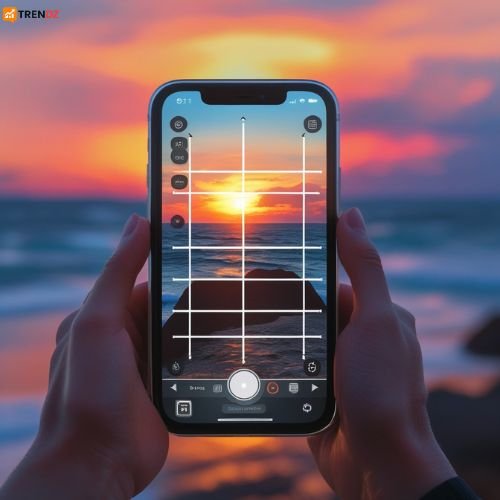
- Get Friendly with the Rule of Thirds This is Photography 101, and it’s a game-changer. Go into your camera settings and turn on the gridlines. Suddenly, your screen has nine squares. Now, instead of plonking your subject dead center, try placing them where the lines intersect. This creates a more dynamic, balanced, and interesting composition. It feels more intentional.
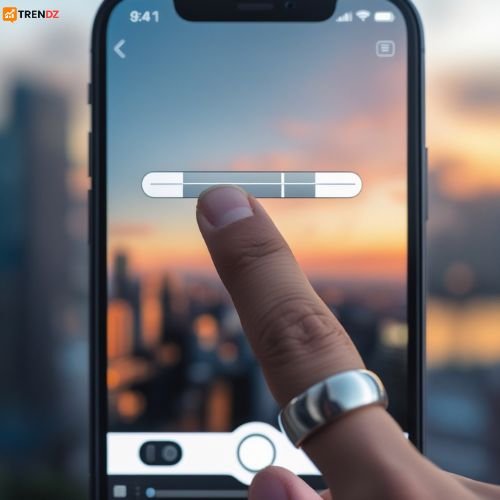
- Don’t Just Tap—Tap and Slide for Perfect Lighting
Your phone’s camera is smart, but it’s not a mind reader. When you frame your shot, tap on the screen where your main subject is. This tells the camera what to focus on. But don’t stop there! Once you see the focus box, you’ll often see a little sun icon. Slide your finger up or down to manually adjust the exposure—brightening or darkening the image before you take the shot. This is your secret weapon for saving a too-dark or too-bright photo.
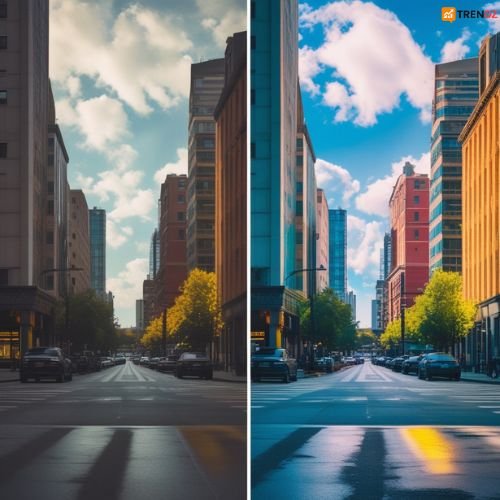
- Let HDR Mode Do the Heavy Lifting
HDR (High Dynamic Range) is fantastic for tricky lighting. It basically takes several photos at different exposures and blends them into one perfect image. This means you get detail in the bright skies and the shadowy areas instead of one or the other being a blown-out mess. It’s a lifesaver for landscapes and sunny-day photos.
- Your Zoom Button is a Trap—Avoid It!
That digital zoom function? It’s basically just cropping the photo before you take it, which murders the image quality. Fight the urge to pinch-to-zoom. Instead, physically move closer to your subject. If you can’t get closer, just take the photo normally and crop it later on your phone. You’ll end up with a much higher-quality, crisper image. I promise.
- Freeze the Action with Burst Mode
Trying to photograph your dog sprinting across the park or your kids playing soccer? Burst mode is your new best friend. On most phones, just hold down the shutter button, and it will fire off a rapid sequence of shots. You can then sift through them later and pick the one perfect frame where everything is sharp and in focus.
- Get That Blurred Background with Portrait Mode
This mode uses software magic to create that beautiful, soft, blurred background (called bokeh) that makes your subject pop. It’s not just for faces! Play around with it for food photography, flower shots, or even cool product pics. The results can be seriously impressive.

- Unlock Pro Power with Third-Party Apps
If you’re ready to level up, the app store is your playground. Apps like Adobe Lightroom Mobile or ProCam give you manual control over settings like ISO, shutter speed, and white balance—just like a professional camera. This is where you can really start to get creative. - Keep It Steady to Avoid the Blurs
It doesn’t matter how good your phone is; if your hands are shaking, the photo will be blurry. Hold your phone with two hands and tuck your elbows into your body for stability. For next-level sharpness, especially in low light, a tiny, portable tripod is a fantastic investment. They’re cheap and make a world of difference. - Guide the Eye with Leading Lines
Look for natural lines in your environment—a winding path, a row of trees, a staircase, or even a shadow. Use these lines to draw the viewer’s eye directly into the photo and toward your main subject. It adds a sense of depth and story to your composition.
- Guide the Eye with Leading Lines
Look for natural lines in your environment—a winding path, a row of trees, a staircase, or even a shadow. Use these lines to draw the viewer’s eye directly into the photo and toward your main subject. It adds a sense of depth and story to your composition.
- If You’re Serious, Shoot in RAW
This one is for the editors out there. If your phone has the option (usually found in “Pro” or manual mode), shoot in RAW format instead of JPEG. RAW files contain way more image data, meaning you have much more flexibility to fix exposure or recover details later in editing apps without losing quality. - Embrace the Beauty of Less (Minimalism)
A cluttered, busy background distracts from your subject. Sometimes the most powerful photos are the simplest. Try framing your shot with a clear, single subject and plenty of “negative” or empty space around it. It creates a calm, powerful, and focused image. - Edit to Enhance, Not to Overwhelm
Editing is where your photos come to life, but it’s easy to go overboard. The goal is to enhance the photo, not hide it under a pile of filters. Apps like Snapseed and Lightroom are perfect for subtle adjustments. A little contrast, a tweak to the warmth, maybe a slight shadow boost. Avoid that super-saturated, unnatural look—unless that’s your specific aesthetic! - Practice, Practice, Practice
This is the most important tip. Your phone is always with you, so use it! Take photos all the time. Experiment with different angles—get down low, shoot from above. Play with light and shadow. Review your photos and see what you like and what you don’t. Your unique style will develop naturally over time.
There you have it! The best part about mobile photography is that it’s all about creativity, not expensive equipment. So grab your phone, keep these tips in mind, and go have fun capturing your world. You’ve got this! ✅
Frequently Asked Questions
Q1. Which is the best app for mobile photography in 2025?
Lightroom Mobile and Snapseed are still the top choices for beginners.
Q2. Should I use filters while clicking or later while editing?
Always shoot natural and add filters later for more control.
Q3. How can I make my mobile photos look like DSLR?
Use portrait mode, natural lighting, RAW shots, and edit with Lightroom.
Q4. Which budget phones are best for mobile photography in 2025?
Google Pixel 9a, iPhone SE 4, and Samsung Galaxy A56 are great choices.
Conclusion
Mobile photography isn’t about having the best camera — it’s about using the right techniques. Apply these 15 tips today and watch your photos transform instantly. Whether you’re capturing travel memories, Instagram reels, or professional shots, your smartphone can handle it all.
Pro Tip: Bookmark this guide and practice one new trick every day — within a month, your photography skills will level up 🚀
Also Read This : Trump’s 50% Tariffs on India , Iphone 17 News


121bett’s where it’s at for all your betting needs. Seriously, they’ve got everything. Give 121bett a shot, you won’t regret it: 121bett